Orbitals Chapter 1 Walkthrough: Repair the Ship
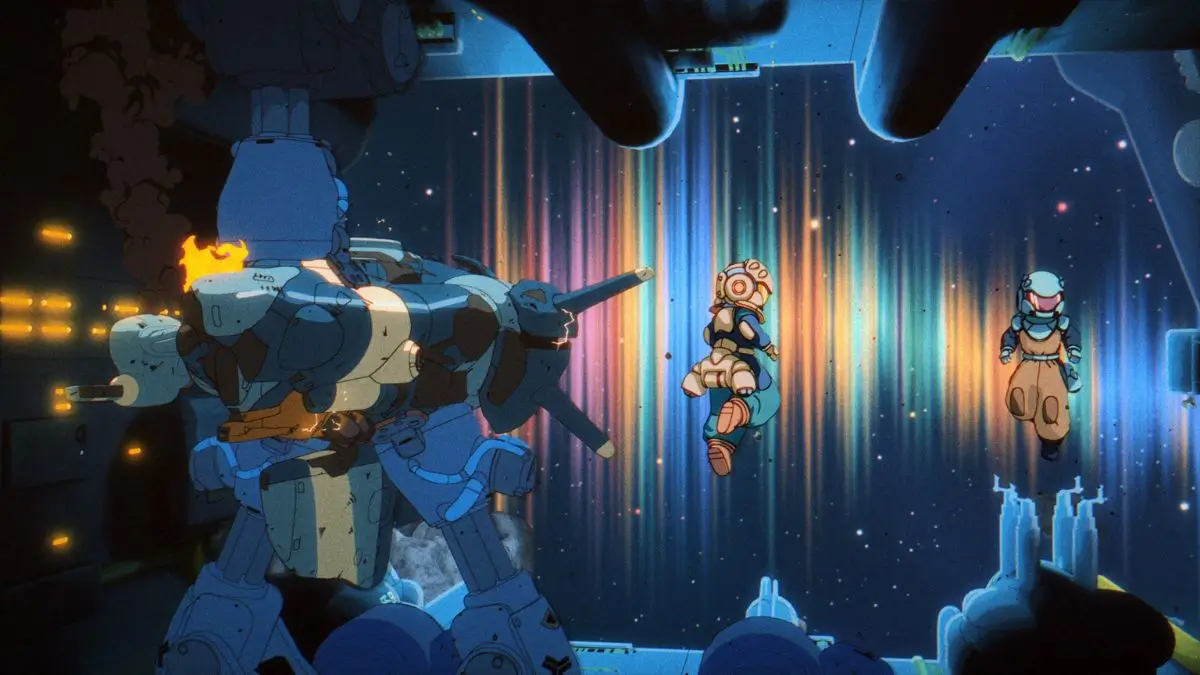
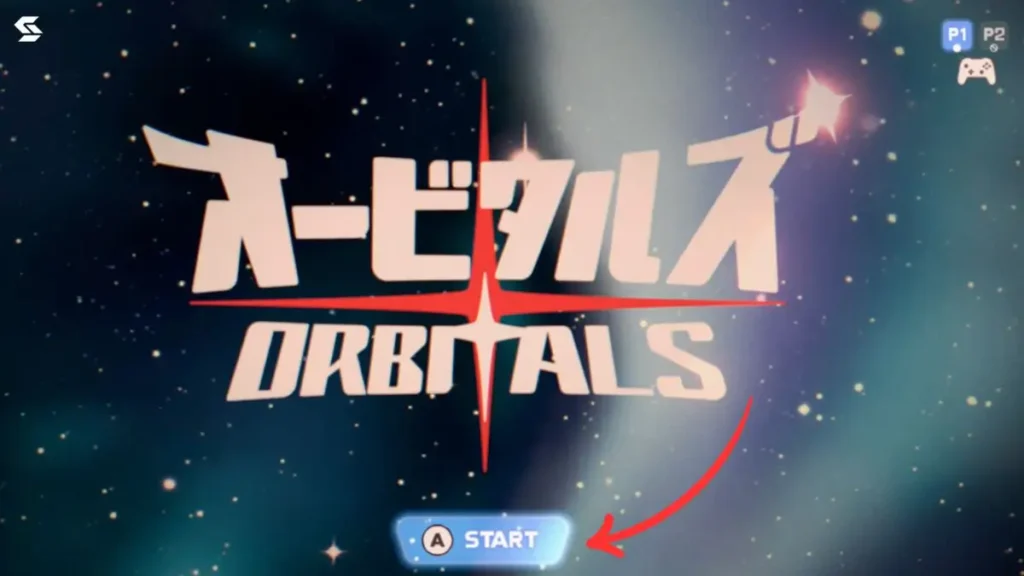
Orbitals is a two-player sci-fi puzzle adventure game. The first time you load into the game, click the Start button on the screen or press A. After this, the game will give you multiple options. If you want to play locally, select that option. Since it is a two-player game, you will also need to select your side, whether you want to be Player 1 or Player 2. The selection at this phase does not really matter much.
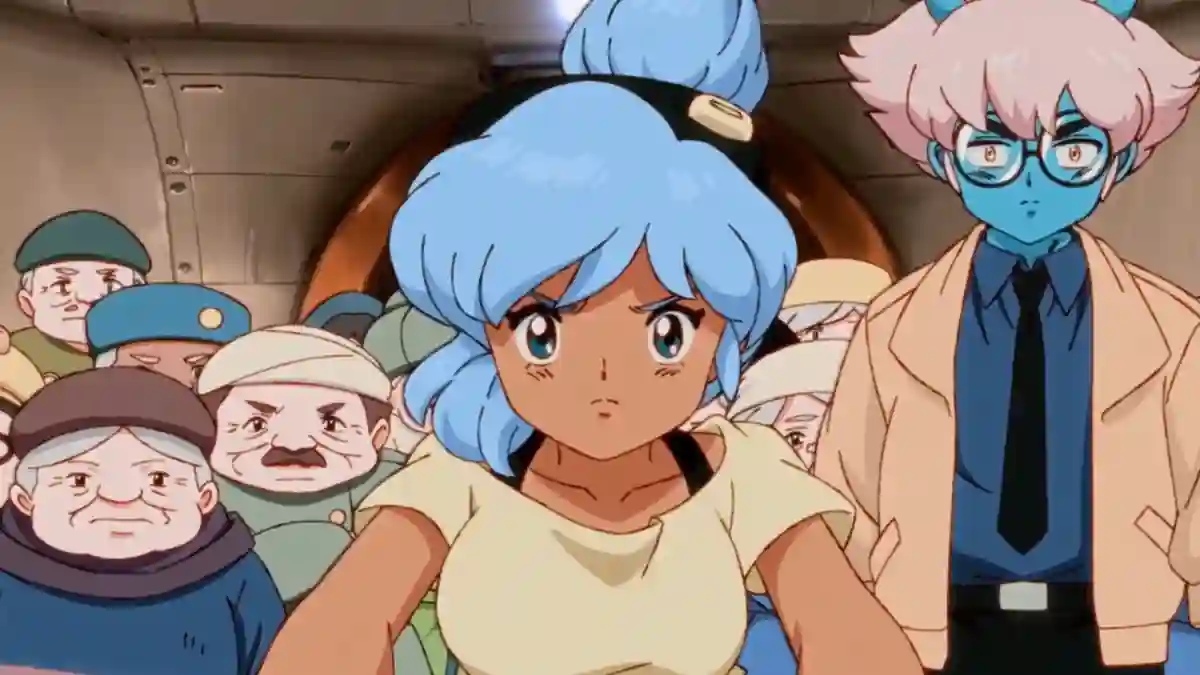
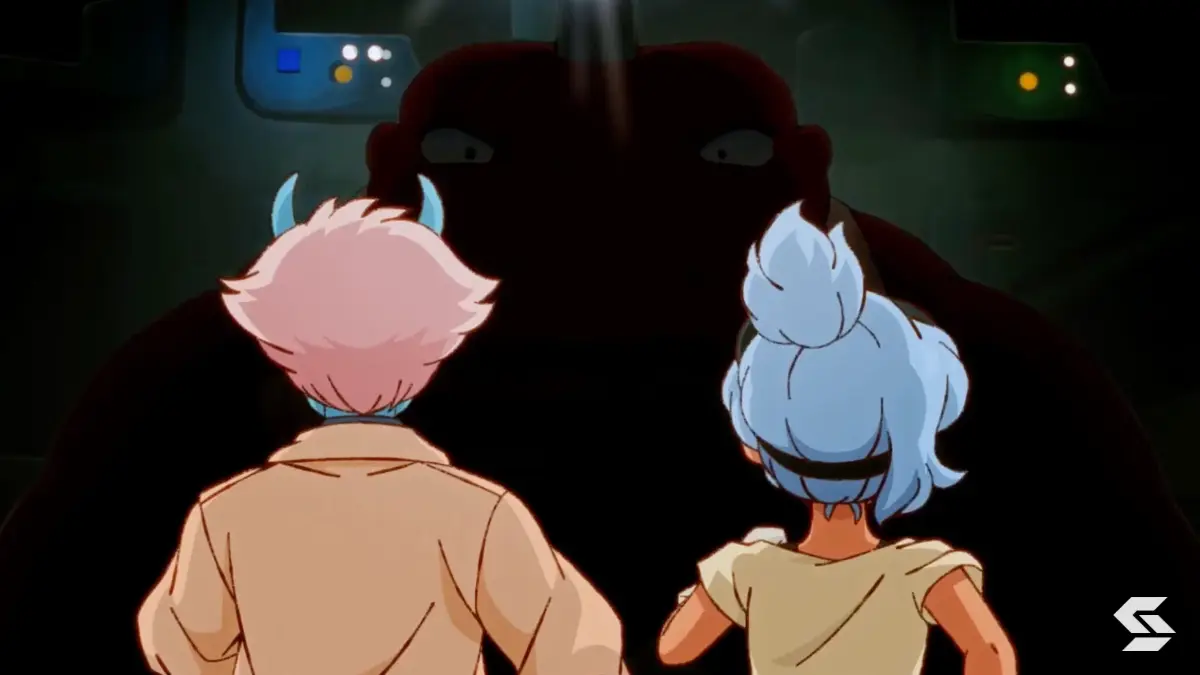
Once both players have joined, you will load into the game and get the option to choose between the two protagonists,  Omura or
  Maki. I have just finished the first episode, and there is no gameplay difference at this point, so you can freely choose either one of them.

The first time you load in you will see a lengthy introductory scene that sets up the story. I won’t spoil it here, so I’ll jump straight into the gameplay.
Objective: Repair the Ship
Sub-Objective: Leave Settlement
Once the scene is over and you are in control of your characters, your first main objective is to repair the Ship. Your first sub-objective is to leave the settlement. The path is pretty linear; however, there are a lot of fun side activities you can do with the other player in this area.
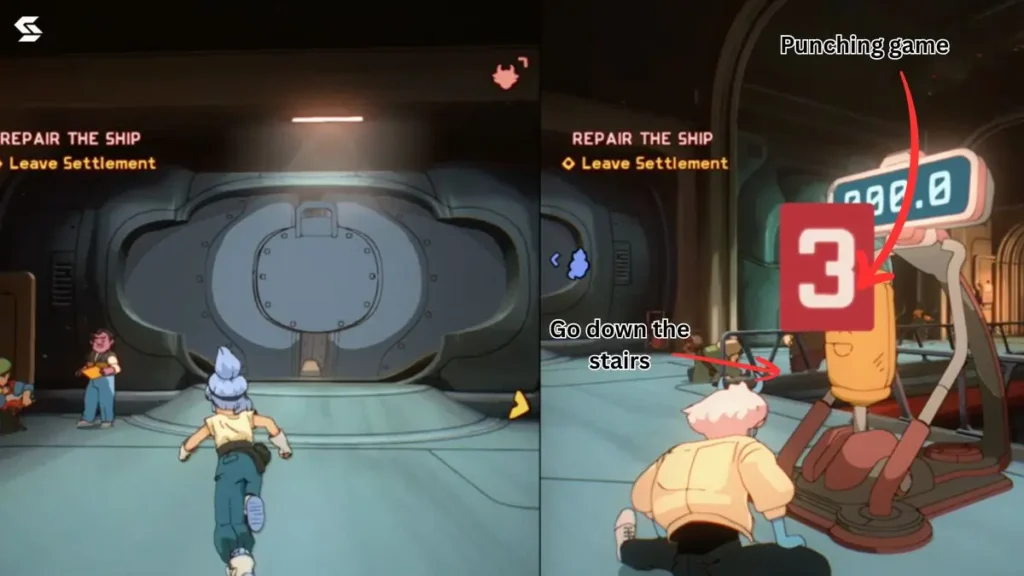
As you keep moving forward, before the first right turn, you will see a punching bag. Once you interact with the machine, spam X repeatedly to score higher.
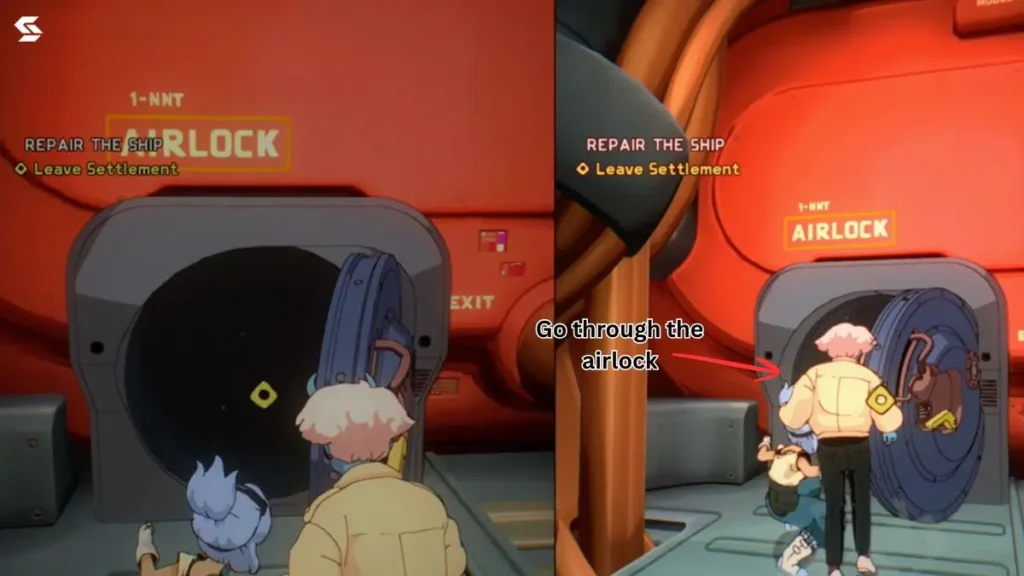
After you are done with this, go down the stairs and take a right. You will notice an airlock on the far end. Reach the airlock and interact with it by pressing X.
Sub-Objective: Enter Your Ship
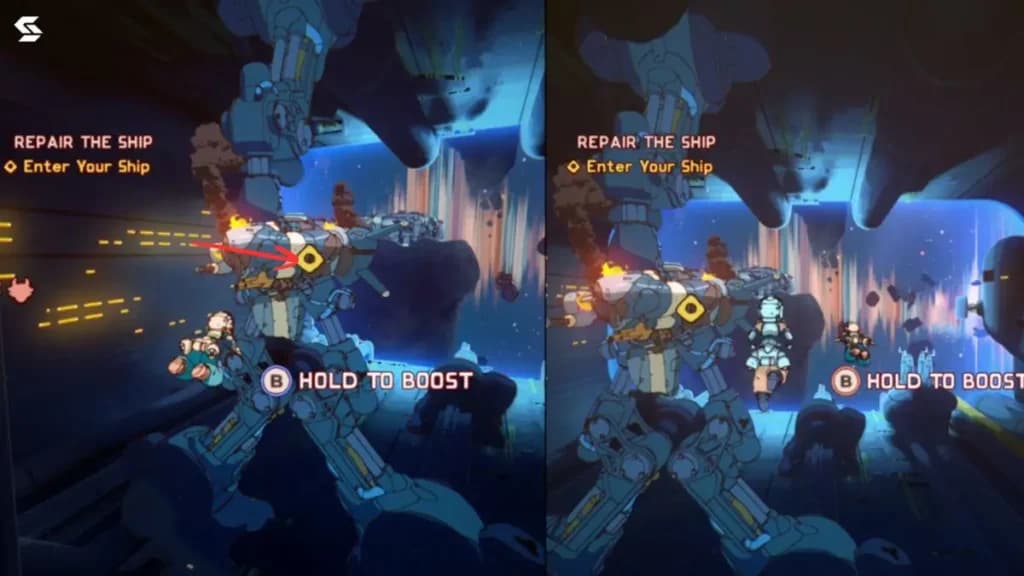
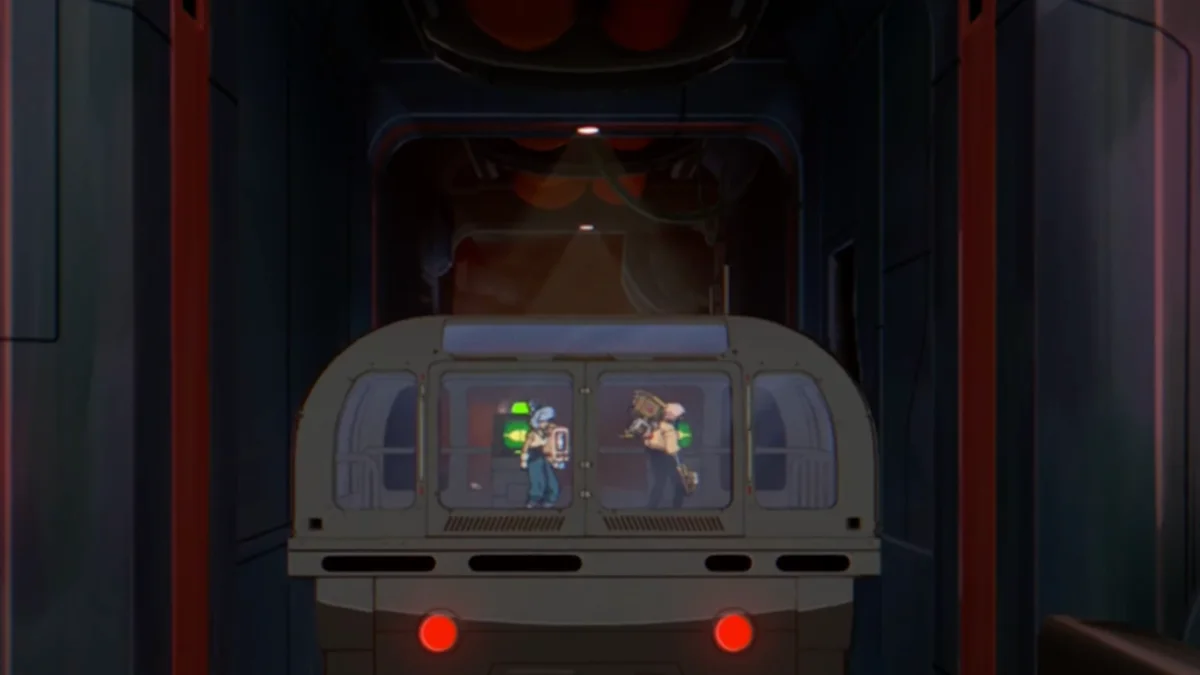
Once you escape, your next sub-objective is to enter your ship. Hold B to boost and reach the vault on the ship. Enter through the airlock of the ship, and you will see fire inside.
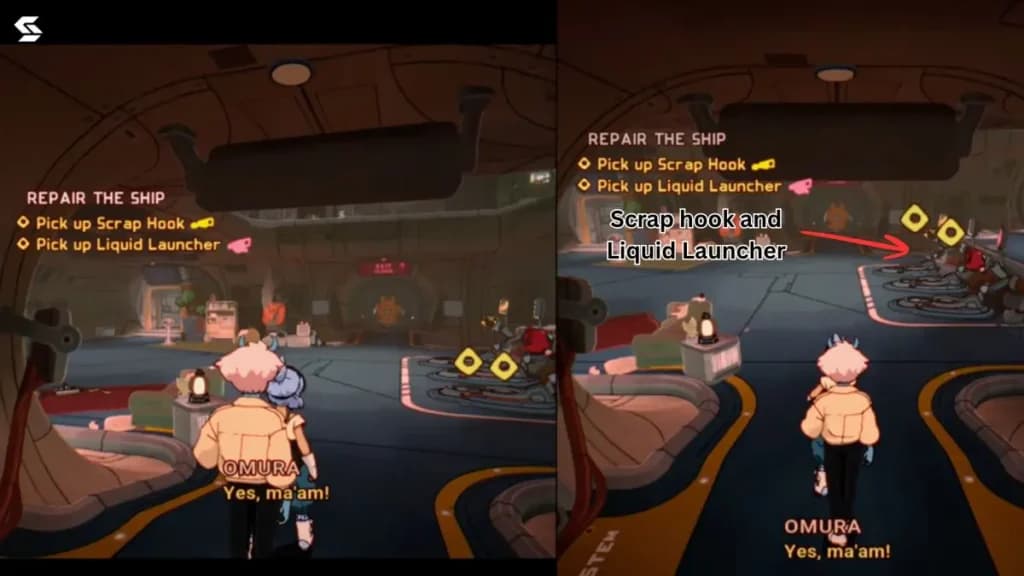
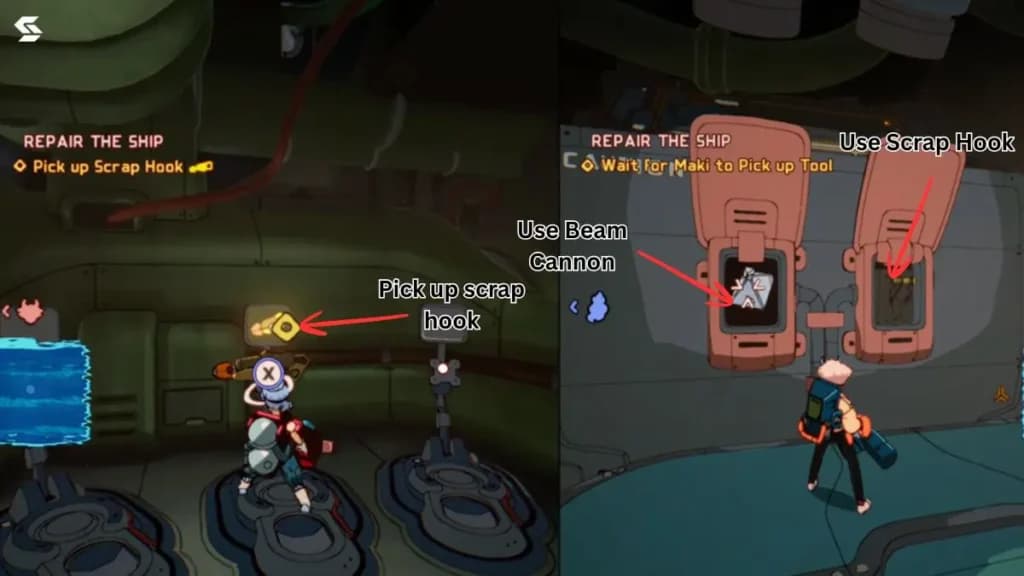
Here you will get your next two sub-objectives: Pick Up  Scrap Hook and Pick Up
  Liquid Launcher. Both of these will be on the right-hand side of the area you just entered. You can choose either weapon while the other player takes the remaining one, as you will be solving puzzles simultaneously using both.
- Scrap Hook: Shoots a hook
- Liquid Launcher: Shoots liquid
The yellow one is the Scrap Hook and the red one is the Liquid Launcher
Sub-Objective: Put Out Fire 0/3
After you have collected both items, your sub-objective will change to “Put Out Fire 0/3″.
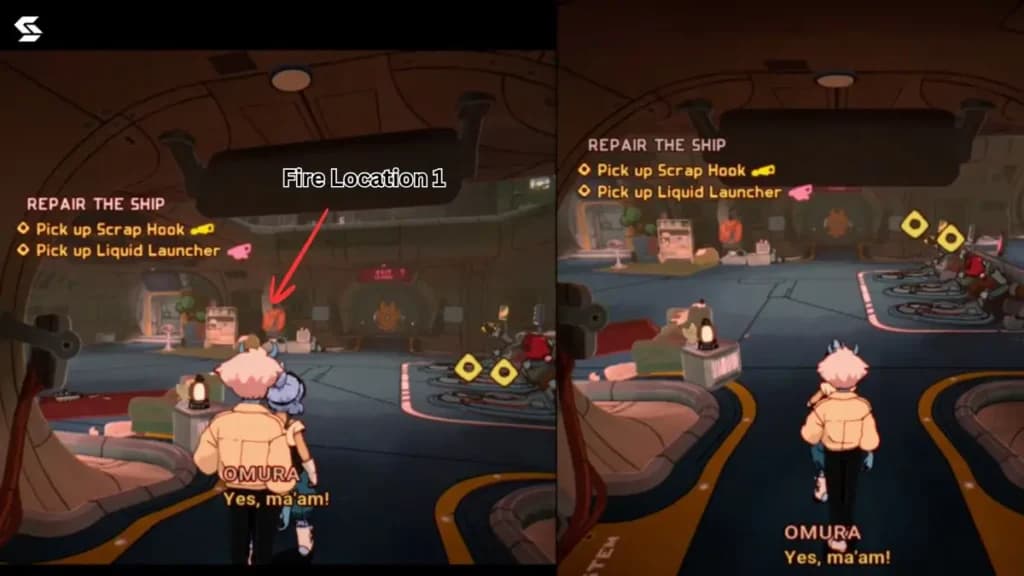
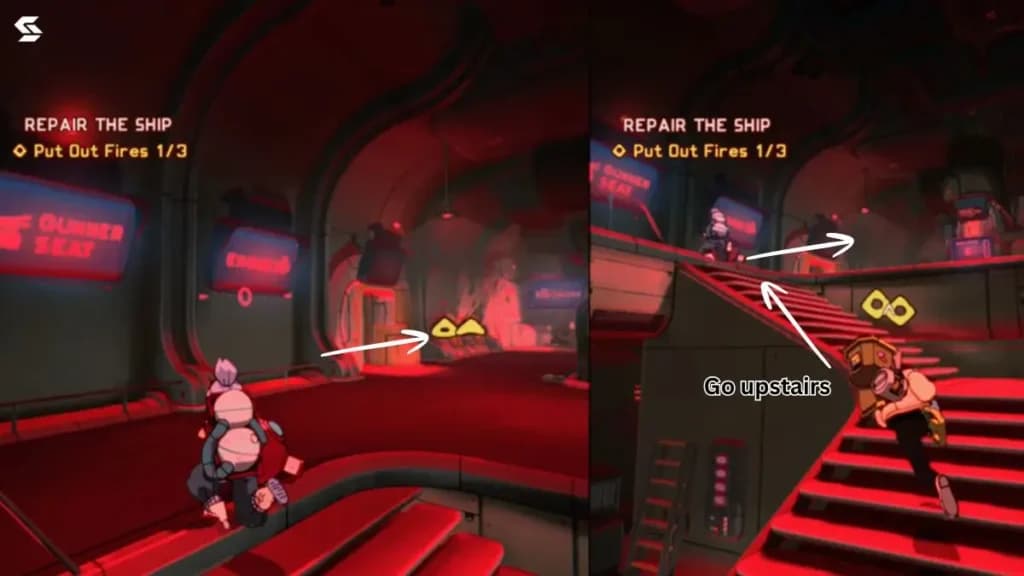
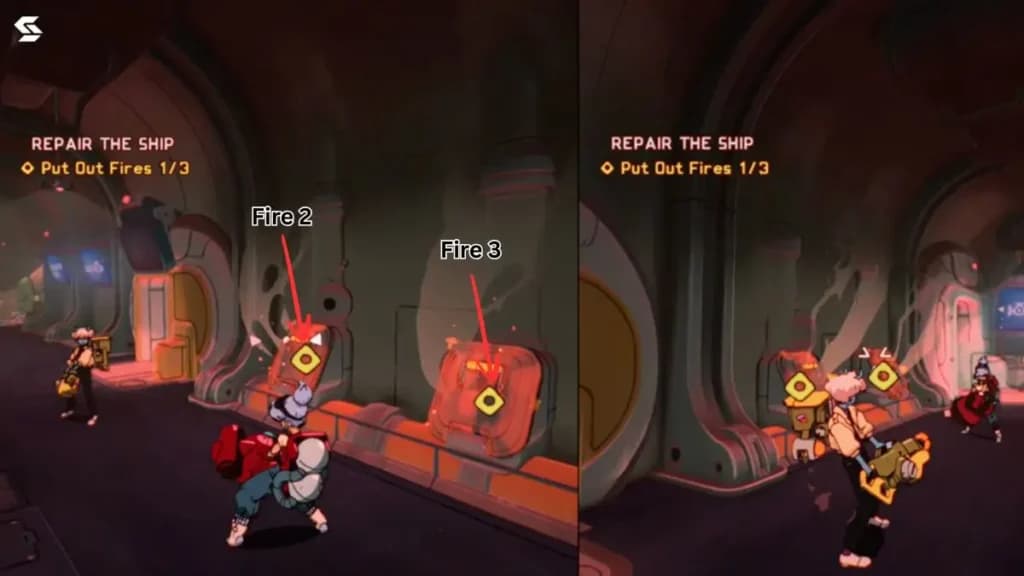
Take a left, and you will see a red panel burning. To put out the fire, the player with the Scrap Hook needs to open the hood of the panel, and the other player needs to shoot liquid using the Liquid Launcher.
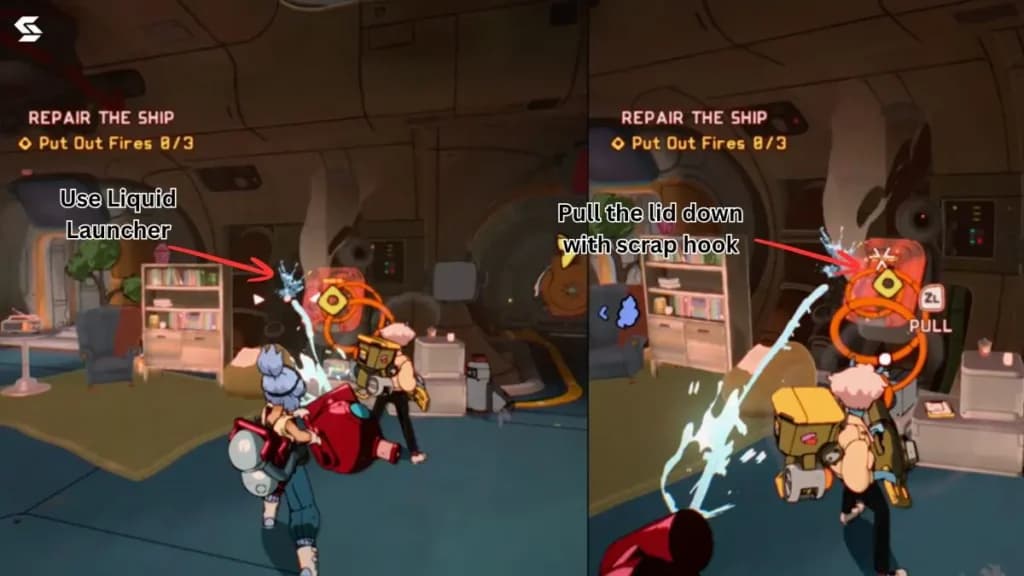
After you have put out the first fire, take the stairs to the upper level. On the left, you will see the remaining two panels. Use the same technique to open them and put out the fire. Once you have done so, a short cutscene will play.
Sub-Objective: Head to the Engine Room
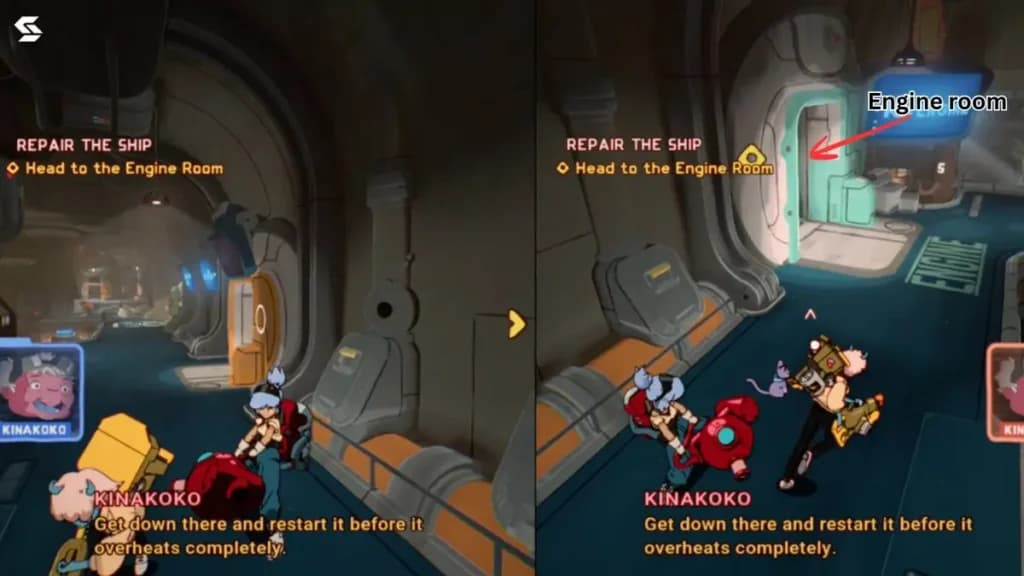
After the cutscene ends, your sub-objective changes to “Head to the Engine Room”. Take a left through the cyan-coloured door next to the panels where we put out the fire. The path here is linear, so keep following it and the yellow marker on screen.
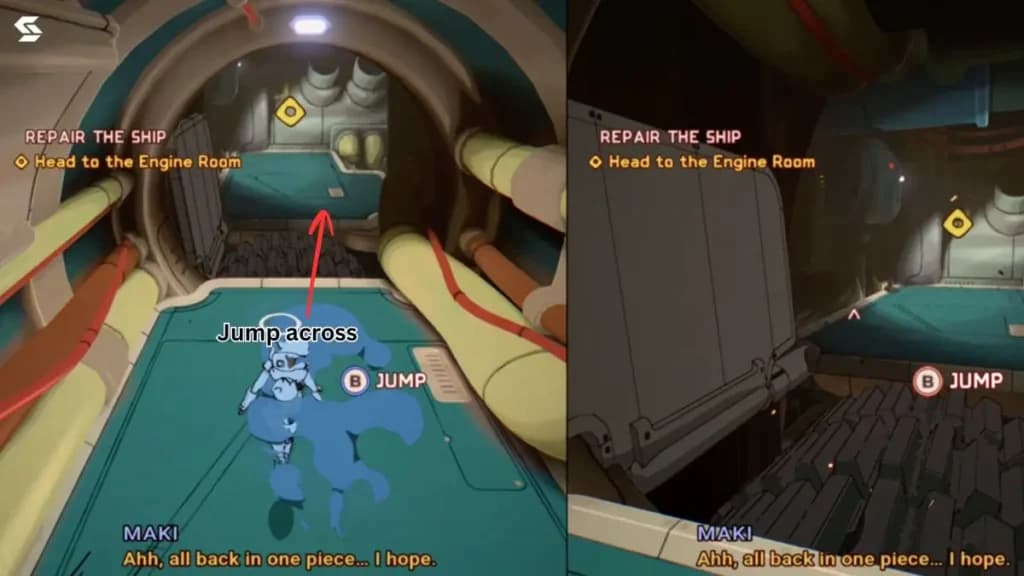
After you take the first right on this path, there will be a large gear cog in the middle. You will need to jump to the other side of the platform without stepping on the cog. Use B to jump and then Y to air dodge.
Once on the other side, take a right and walk down the stairs. You have now entered the engine room.
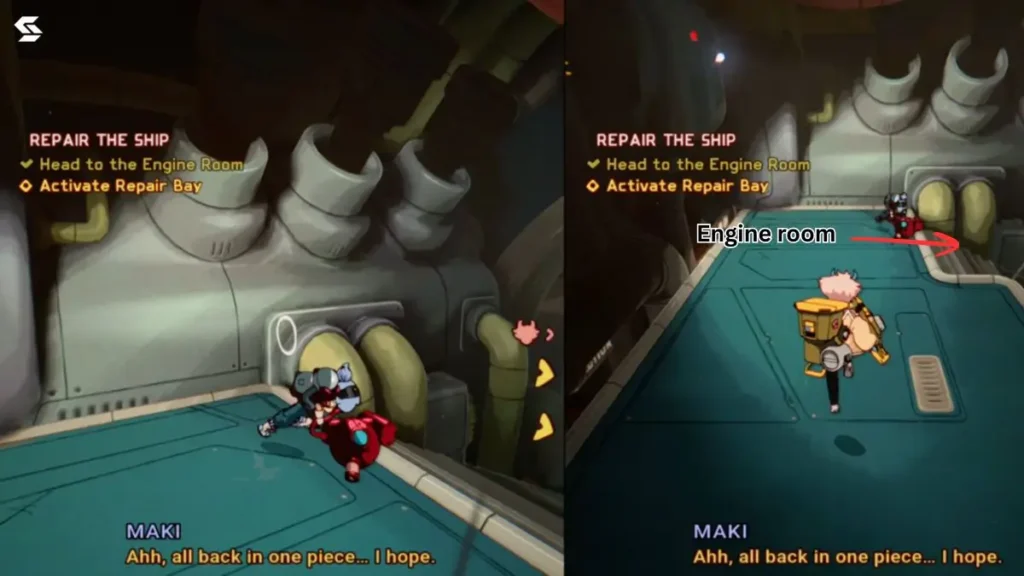
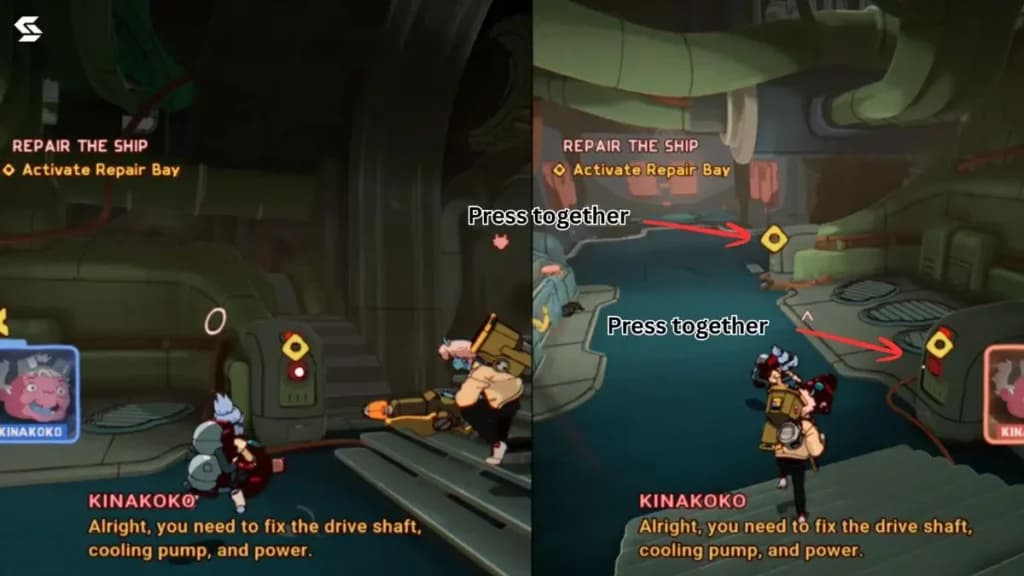
Sub-Objective: Activate Repair Bay
In the engine room, you will notice two red buttons on the right-hand side, spaced a bit apart from each other. You need to press both of them at the same time, so one player presses X on the first one while the other presses X on the second one. A short scene will play after that, and you will notice a new gun spawn on the stand between the buttons.
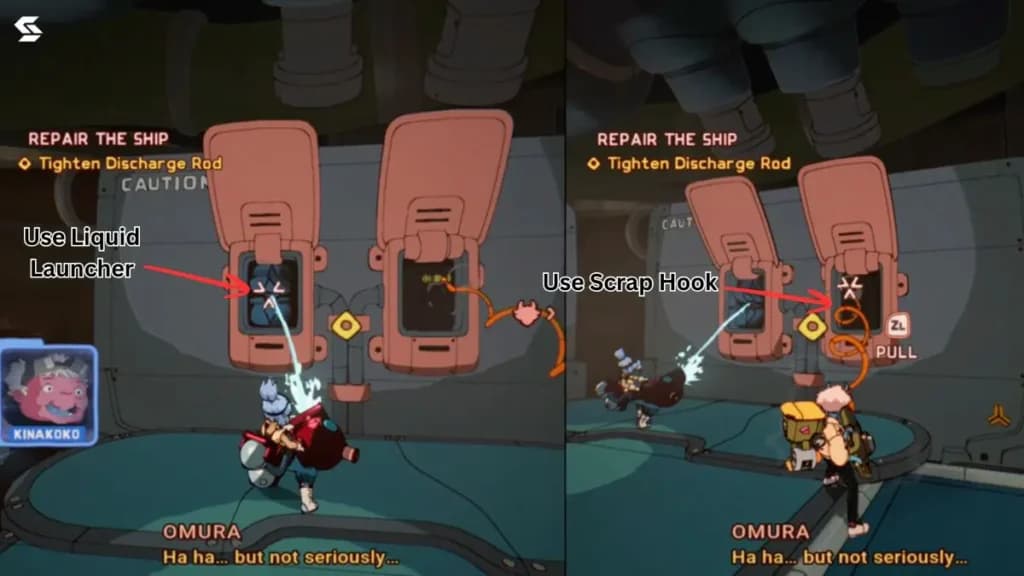
Sub-Objective: Tighten Discharge Rod
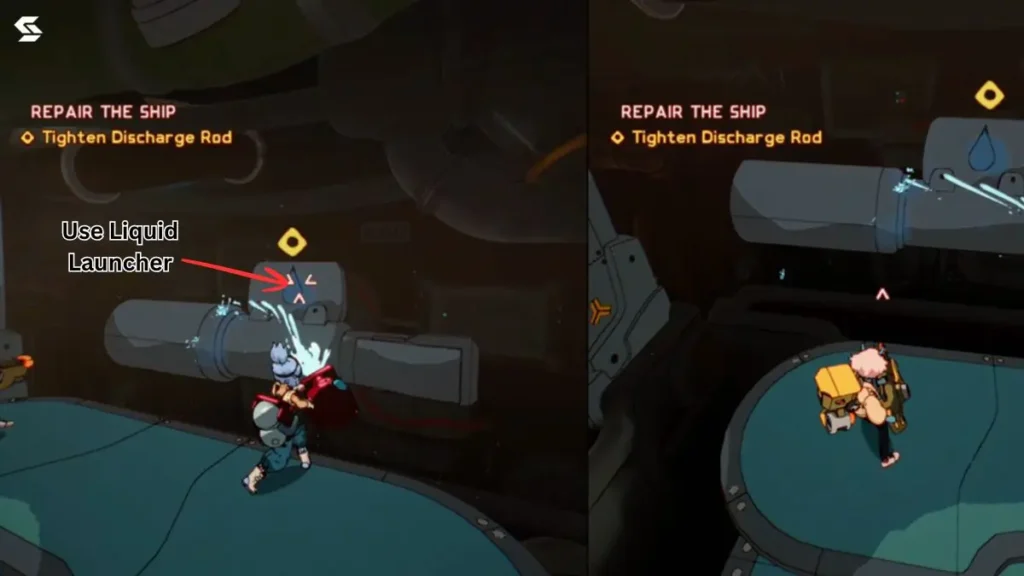
After this, your sub-objective changes to “Tighten Discharge Rod”. On the far end of the engine room, you will notice pink boxes. Use the Scrap Hook to pull on the right one and the Liquid Launcher on the left one consistently. This will lower the metal wall, and you will see a metal rod on the other side.
Use the Liquid Launcher when the flap is on top, and when it is on the bottom use the Scrap Hook to pull it. This will keep moving the discharge rod forward. Keep doing this until it connects to the other end.
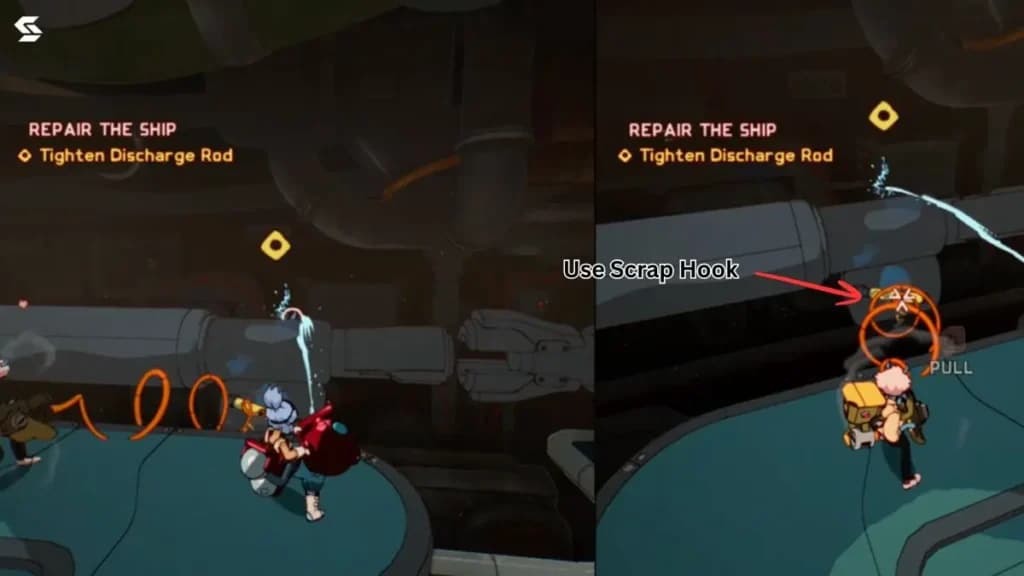
Sub-Objective: Recalibrate the Boiler
After this, the sub-objectives on both screens will be different. On Omuras side, it will be Pick Up  Beam Cannon, while on Maki’s side it will be Wait for Omura to Pick Up Tool. This is the same tool that spawned earlier between the buttons. Switch the Scrap Hook for the Beam Cannon now. After this, the sub-objective changes to Recalibrate the Boiler.
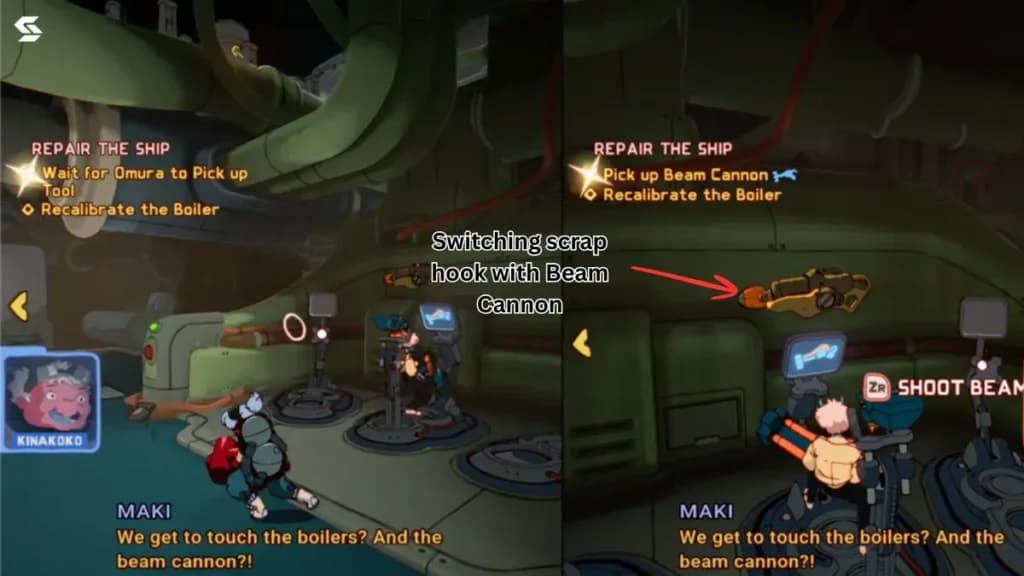
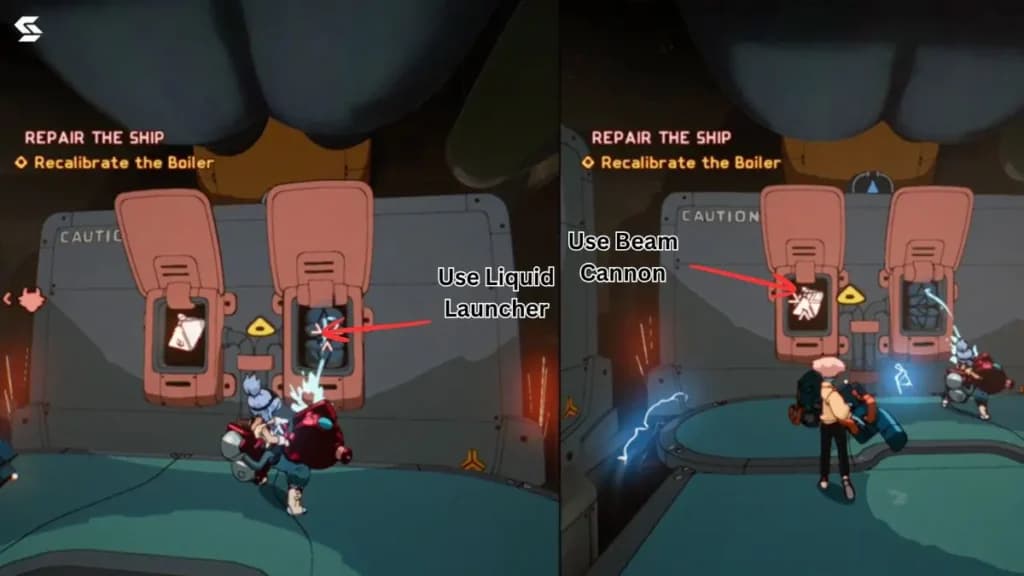
Get back to the far end of the room. You will spot that the other two of the pink boxes on the front metal separator are now open. Use the Liquid Launcher on the right box and the Beam Cannon on the left one. This will lower the metal separator, and you will be able to see the boiler.
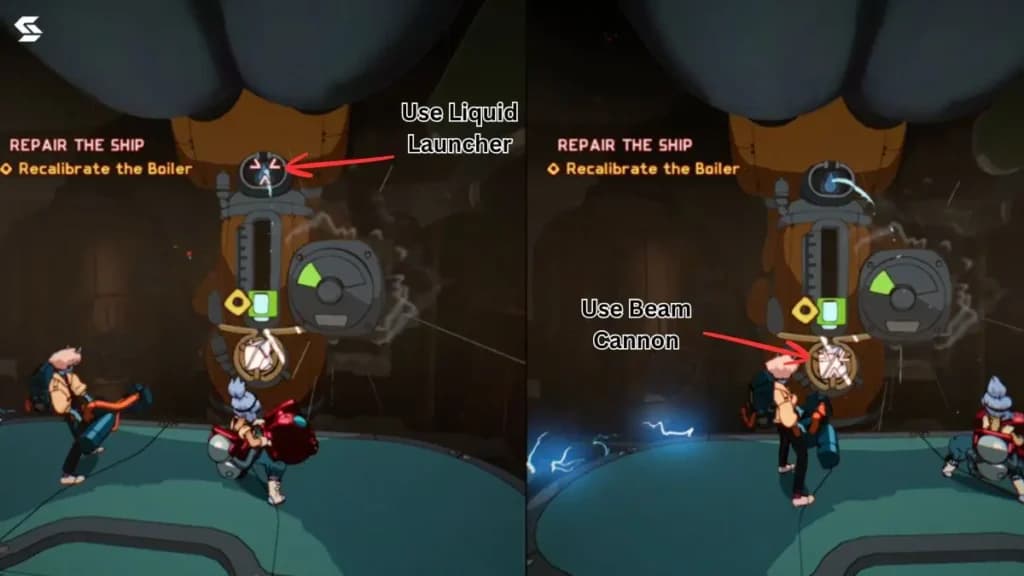
You will notice a droplet icon on top of the boiler and another icon on the bottom. The player with the Beam Cannon needs to shoot the bottom icon first so that the red bar in the center drops all the way down and turns green. Then the player with the Liquid Launcher shoots the upper icon to raise the water level. Keep this going and you will soon reach the acceptable range of boiler pressure, completing the sub-objective.
Sub-Objective: Rewire Circuits
After this, your sub-objectives change again and are read separately for both players. On Omura’s side, it will be Wait for Maki to Pick Up the Tool, and on Maki’s side, it will be Pick Up the Scrap Hook. Go back to the place where you switched your weapons, and have Maki pick up the Scrap Hook by switching it with the Liquid Launcher.
Once done, the sub-objective will change to “Rewire Circuits”. Go back to the far end of the engine room, and the last two pink panels will now be open. Use the Beam Cannon on the left one and the Scrap Hook on the right one. This will lower the metallic separator.
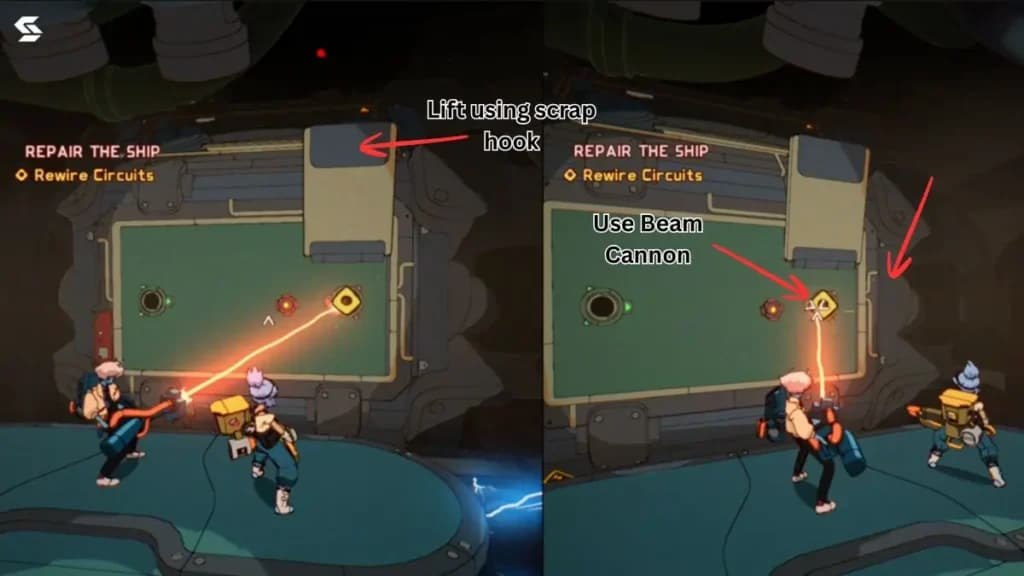
You will see a red metallic orb that follows the beam. On the right side, you will see a metallic sheet that can be lifted using the Scrap Hook. Use the Scrap Hookto pull up the metallic lid, and then use the Beam Cannon to guide the orb to the hole.
After this, the circuit will rotate again. This time the puzzle is different. You will see a yellow button in the center that rotates the shaft anticlockwise. Use the Beam Cannon to guide the red orb from the left to the lower-right quadrant first, then use the Scrap Hook to rotate the shaft anticlockwise. Then use the Beam Cannon to guide the orb to the top-right quadrant, and use the Scrap Hook again to rotate the shaft; then guide the orb to its destination.
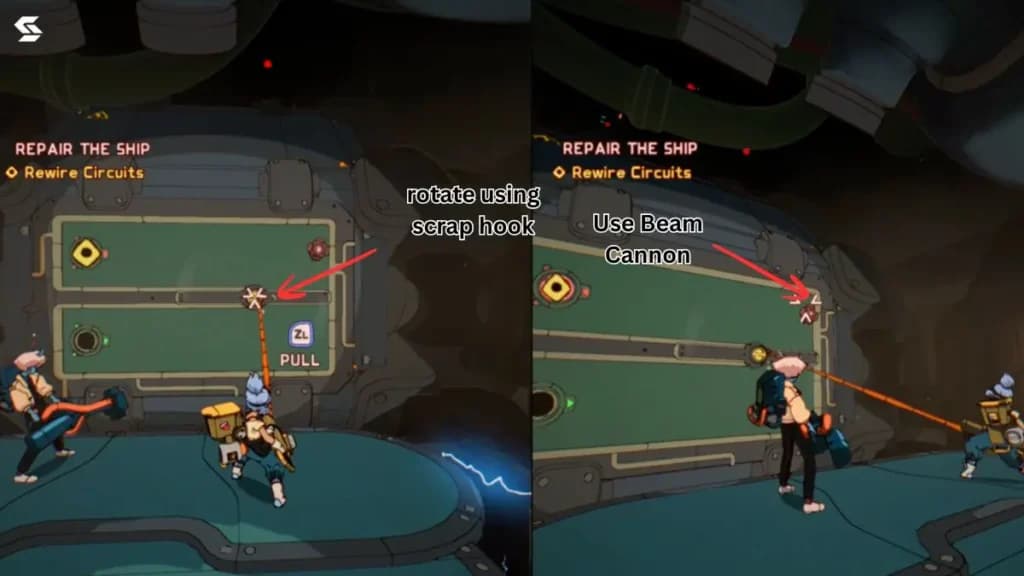
The circuit will change again. This time, the shaft rotates clockwise, so be careful. Rotate the shaft first, and then take the red orb to the top-left corner. Rotate the shaft again, and this will give you a clear path to guide the orb from the top-left to its destination.
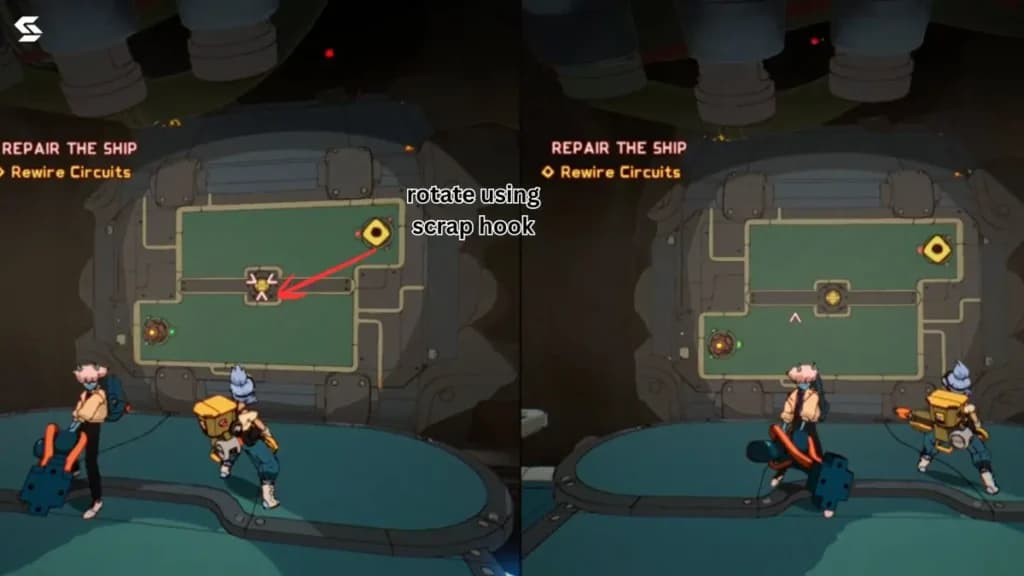
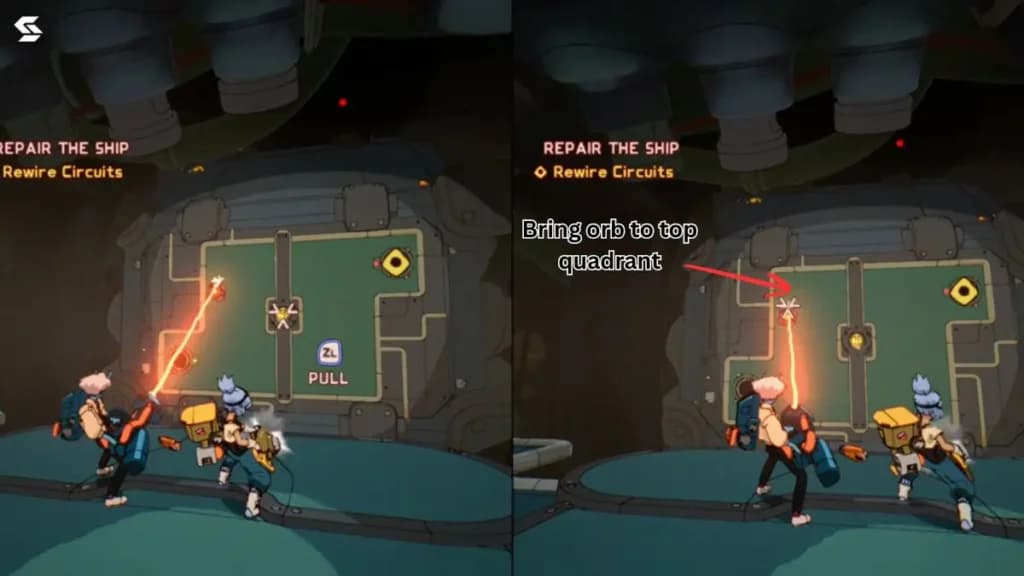
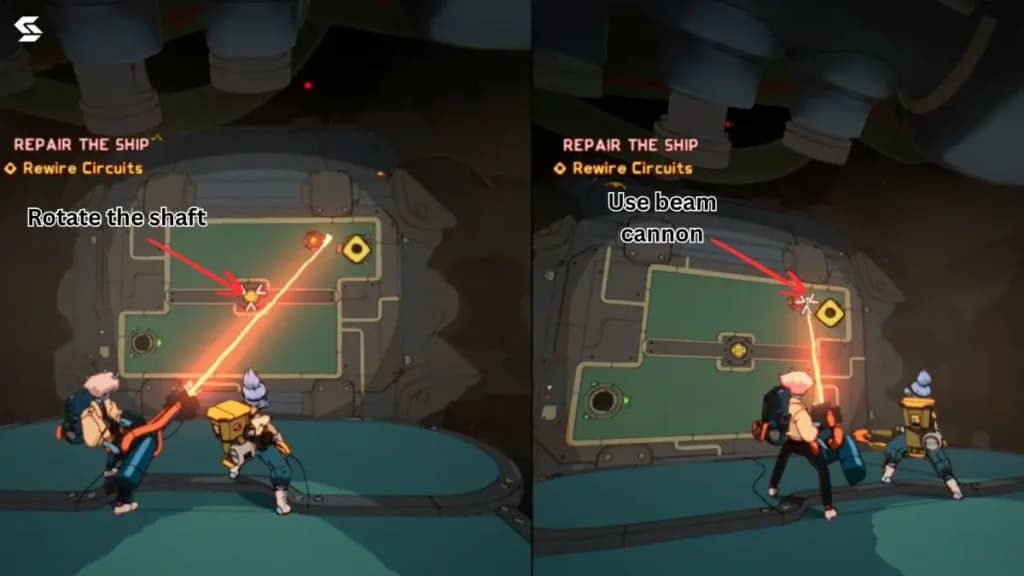
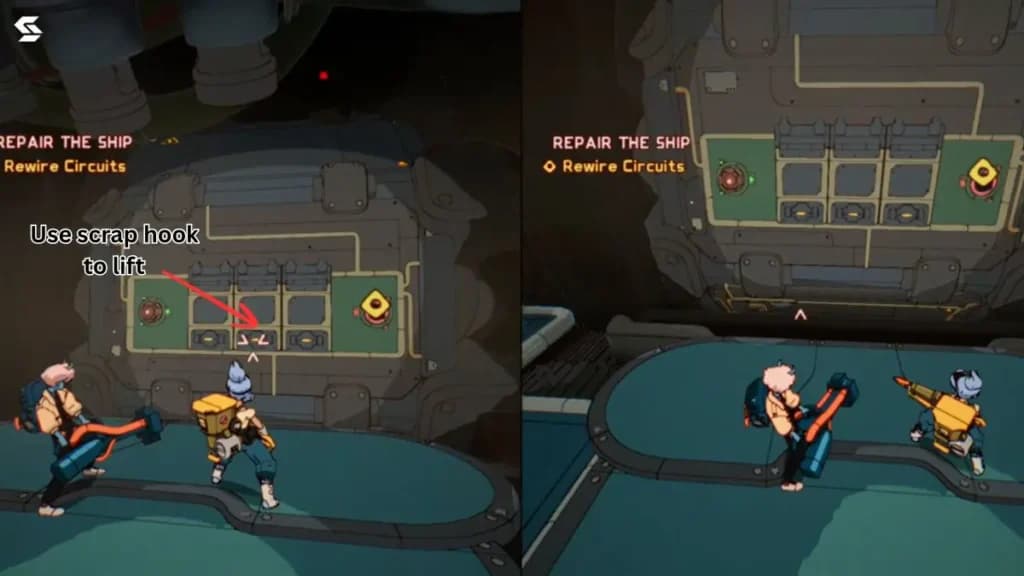
After this, the circuit rotates one final time. There are three lids in the center. Lift them with the Scrap Hook one by one, in sync with the Beam Cannon. This will complete your sub-objective Rewire Circuits, and your next sub-objective will be “Reboot Engine”.
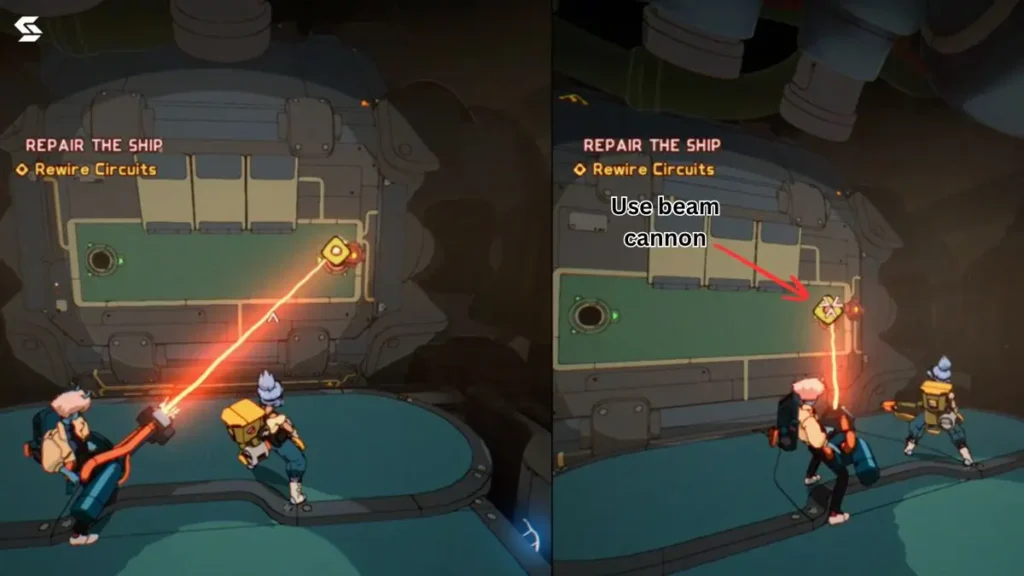
Sub-Objective: Reboot Engine
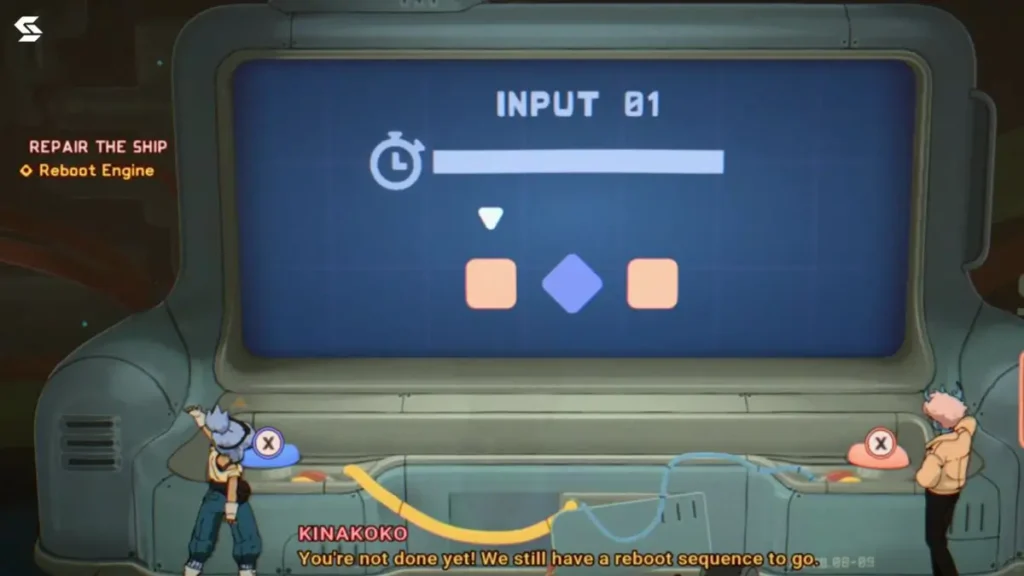
Go back to the entrance of the engine room. On the left side, you will notice a digital screen with two colored buttons, red and blue. Each player needs to stand on a separate button. Once you are both in position, you will notice shapes in different colors on the screen with “Input” written on top. Here are all five inputs:
Input 1: Red Square, Blue Diamond, Red Square.
Press red, blue, red.
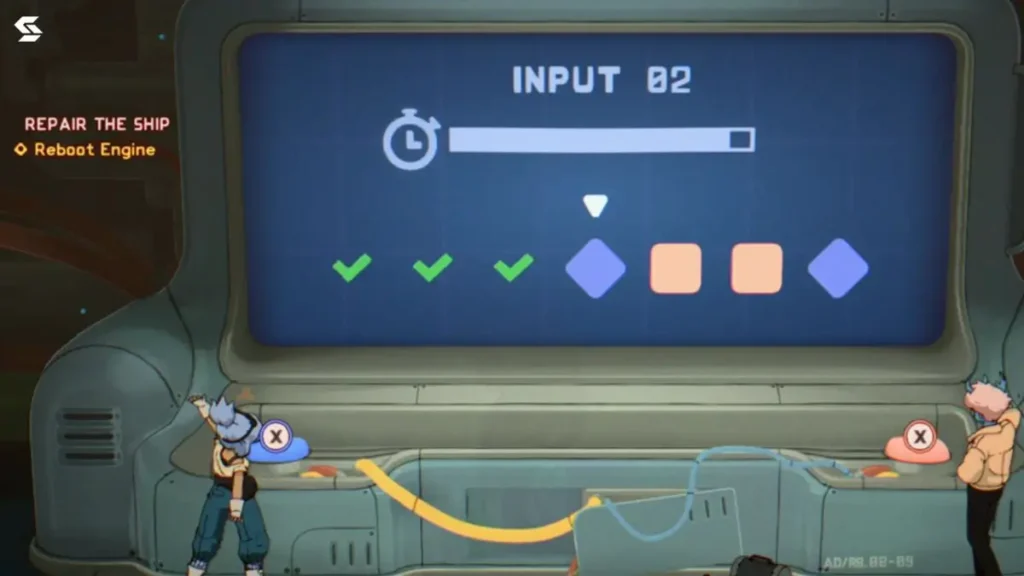
Input 2: Blue Diamond, Blue Diamond, Red Arrows, Red Square, Blue Diamond, Blue Diamond, Red Square.
Press blue, blue, red. Note: Once you press the arrows, the red and blue buttons interchange, so the rest of the sequence becomes blue, red, red, blue.
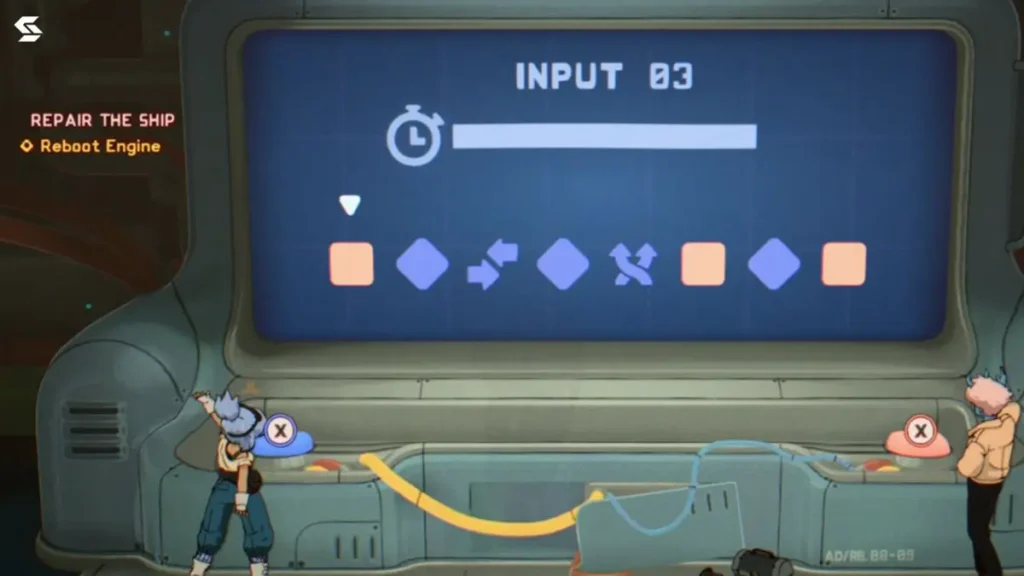
Input 3: Red Square, Blue Diamond, Blue Back and Forth, Blue Diamond, Blue Arrow, Red Square, Blue Diamond, Red Square.
Press red, blue, blue. This triggers the interchange, swapping your button assignments, so be careful from here. Then press blue again. This triggers another sequence change, making the remaining sequence Blue Diamond, Red Square, Red Square. So now press blue, red, red.
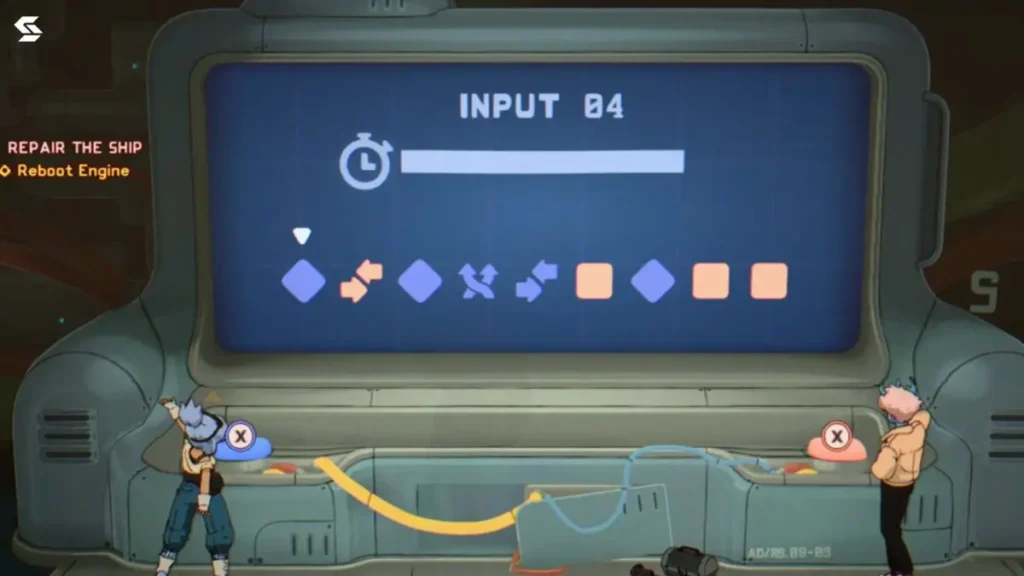
Input 4: Blue Diamond, Interchange Arrows, Blue Diamond, Blue Cross Arrows, Blue Interchange, Red Square, Blue Diamond, Red Square, Red Square.
Press blue, red, blue, blue. This changes the sequence, and the remaining inputs become Red Diamond, Red Diamond, Blue Exchange, Red Diamond, Blue Square. So now press red, red, blue, red, blue.
Input 5: Red Square, Red Square, Red Cross Arrows, Blue Diamond, Blue Interchange, Blue Diamond, Red Square, Red Square, Red Interchange, Blue Diamond.
Press red, red, red. This changes the sequence to Blue Interchange, Red Square, Blue Diamond, Red Interchange, Blue Diamond, Blue Diamond, Red Square. So now press blue, red, blue, red, blue, blue, red.
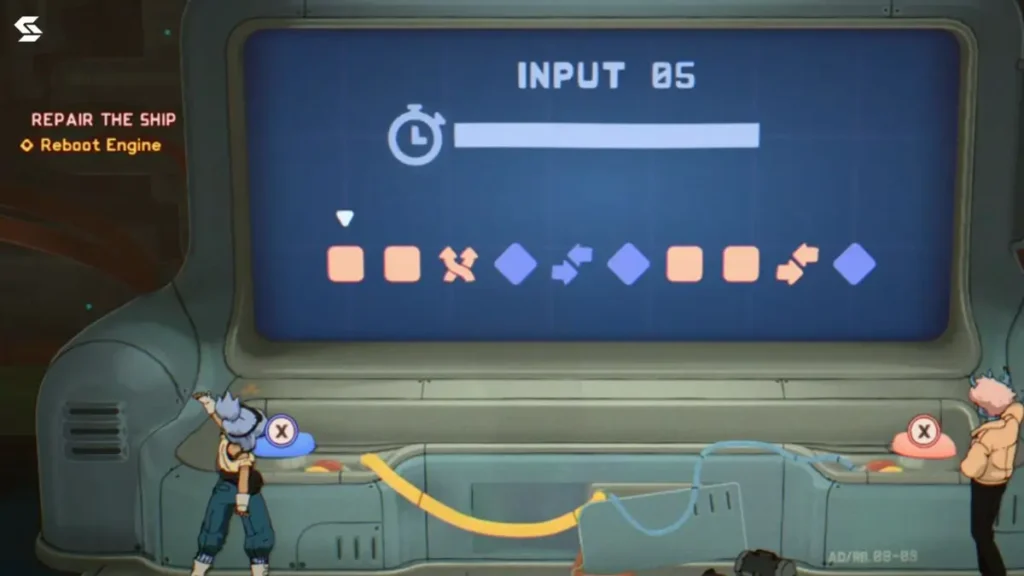
A cutscene will play after this, completing your first main objective: “Repair the Ship”.
Objective: Initiate Departure
Your next objective is to initiate departure with two sub-objectives: “Enter the Gunner Seat” and “Enter Pilot Seat”. One player heads to the gunner seat while the other goes to the pilot seat.
From the engine room, head back upstairs and take a right. Keep moving forward, and the gunner seat will be on the right side. The other player needs to go back downstairs to the area where we found the first two tools. The pilot area is on the far end of that section.
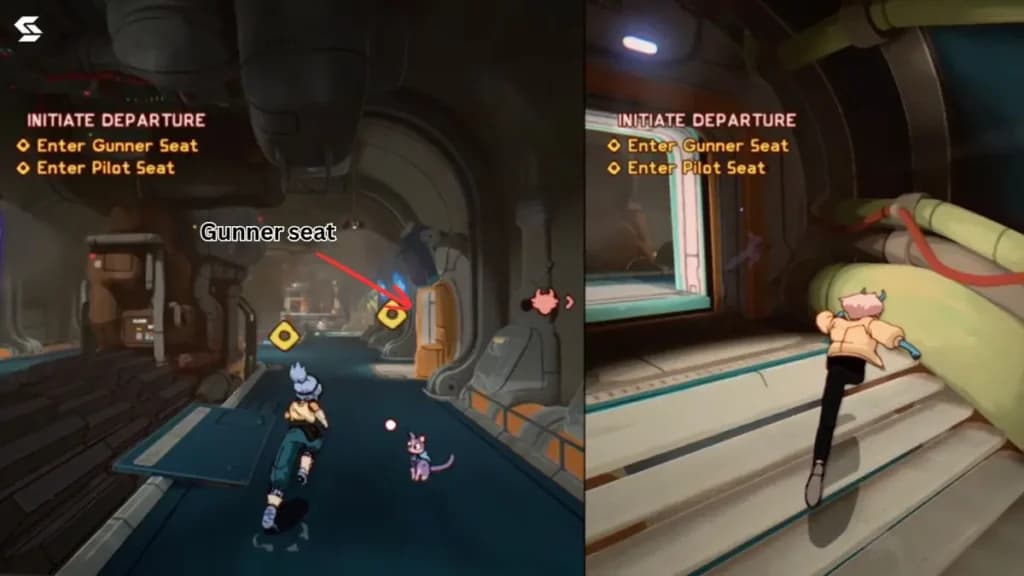
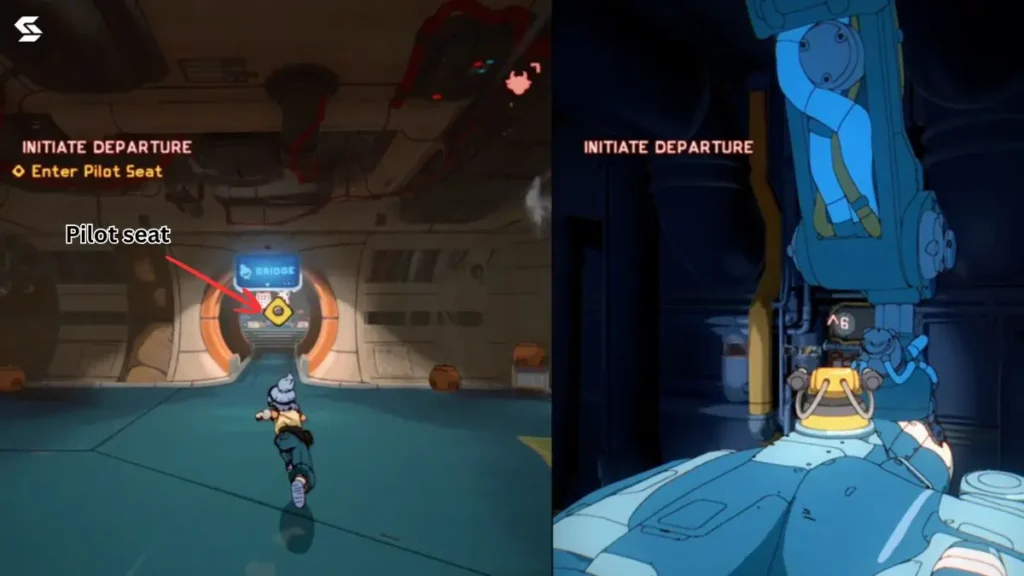
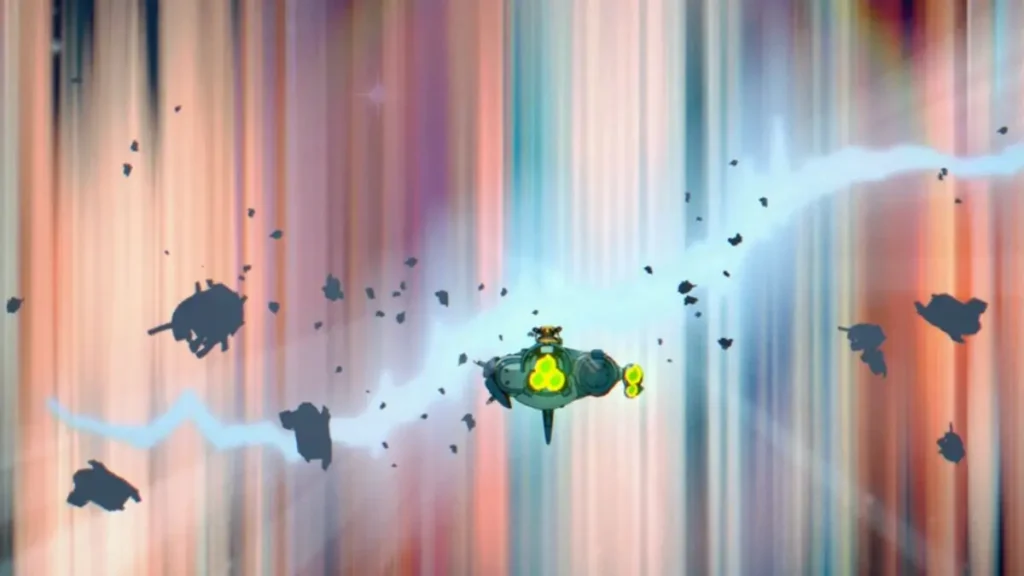
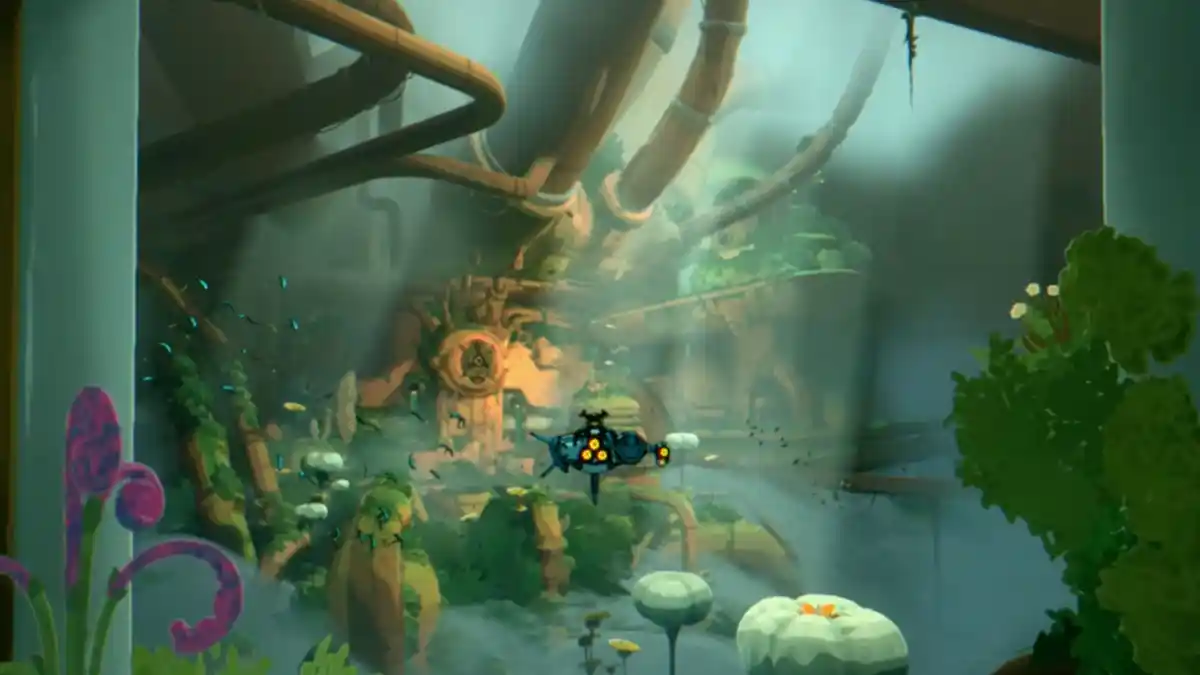
Once you are both in your seats, a cutscene will play. You will then be in control of the ship. Keep moving toward the yellow marker on screen to enter the rift. A short cutscene will play after that, and you will move on to Orbitals Chapter 2.
Related Posts
About Orbitals

- Released
- September 3, 2026
- Developer
- Shapefarm
- Publisher
- Kepler Interactive
- Platforms
- Nintendo Switch 2
- Genres
- Puzzle-adventure
- Rating
- E10+ (Everyone 10 and Older)
- Multiplayer
- Available